Starting to create a mock API is very simple. You can sign in with your Google or Github account. We also give you the option to sign in as a guest, but keep in mind that your data won't be permanent. Guest sign-in is intended for you to test the tool without registering, though we're sure you'll register once you see how much you like it.
Create a project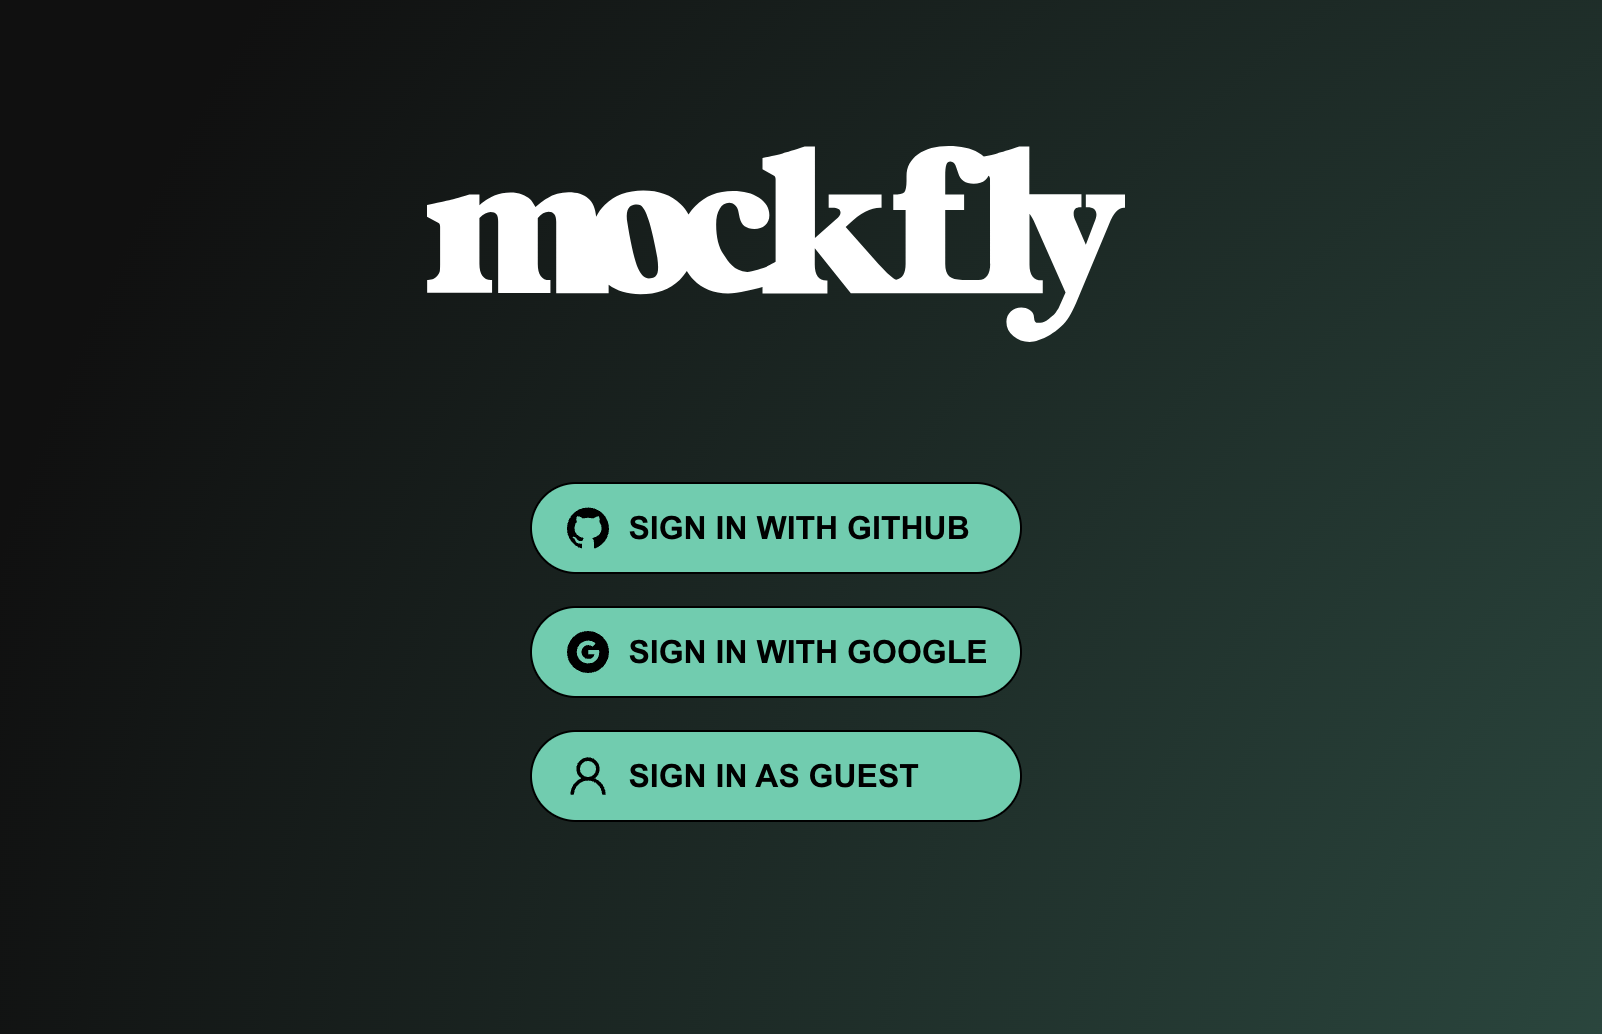
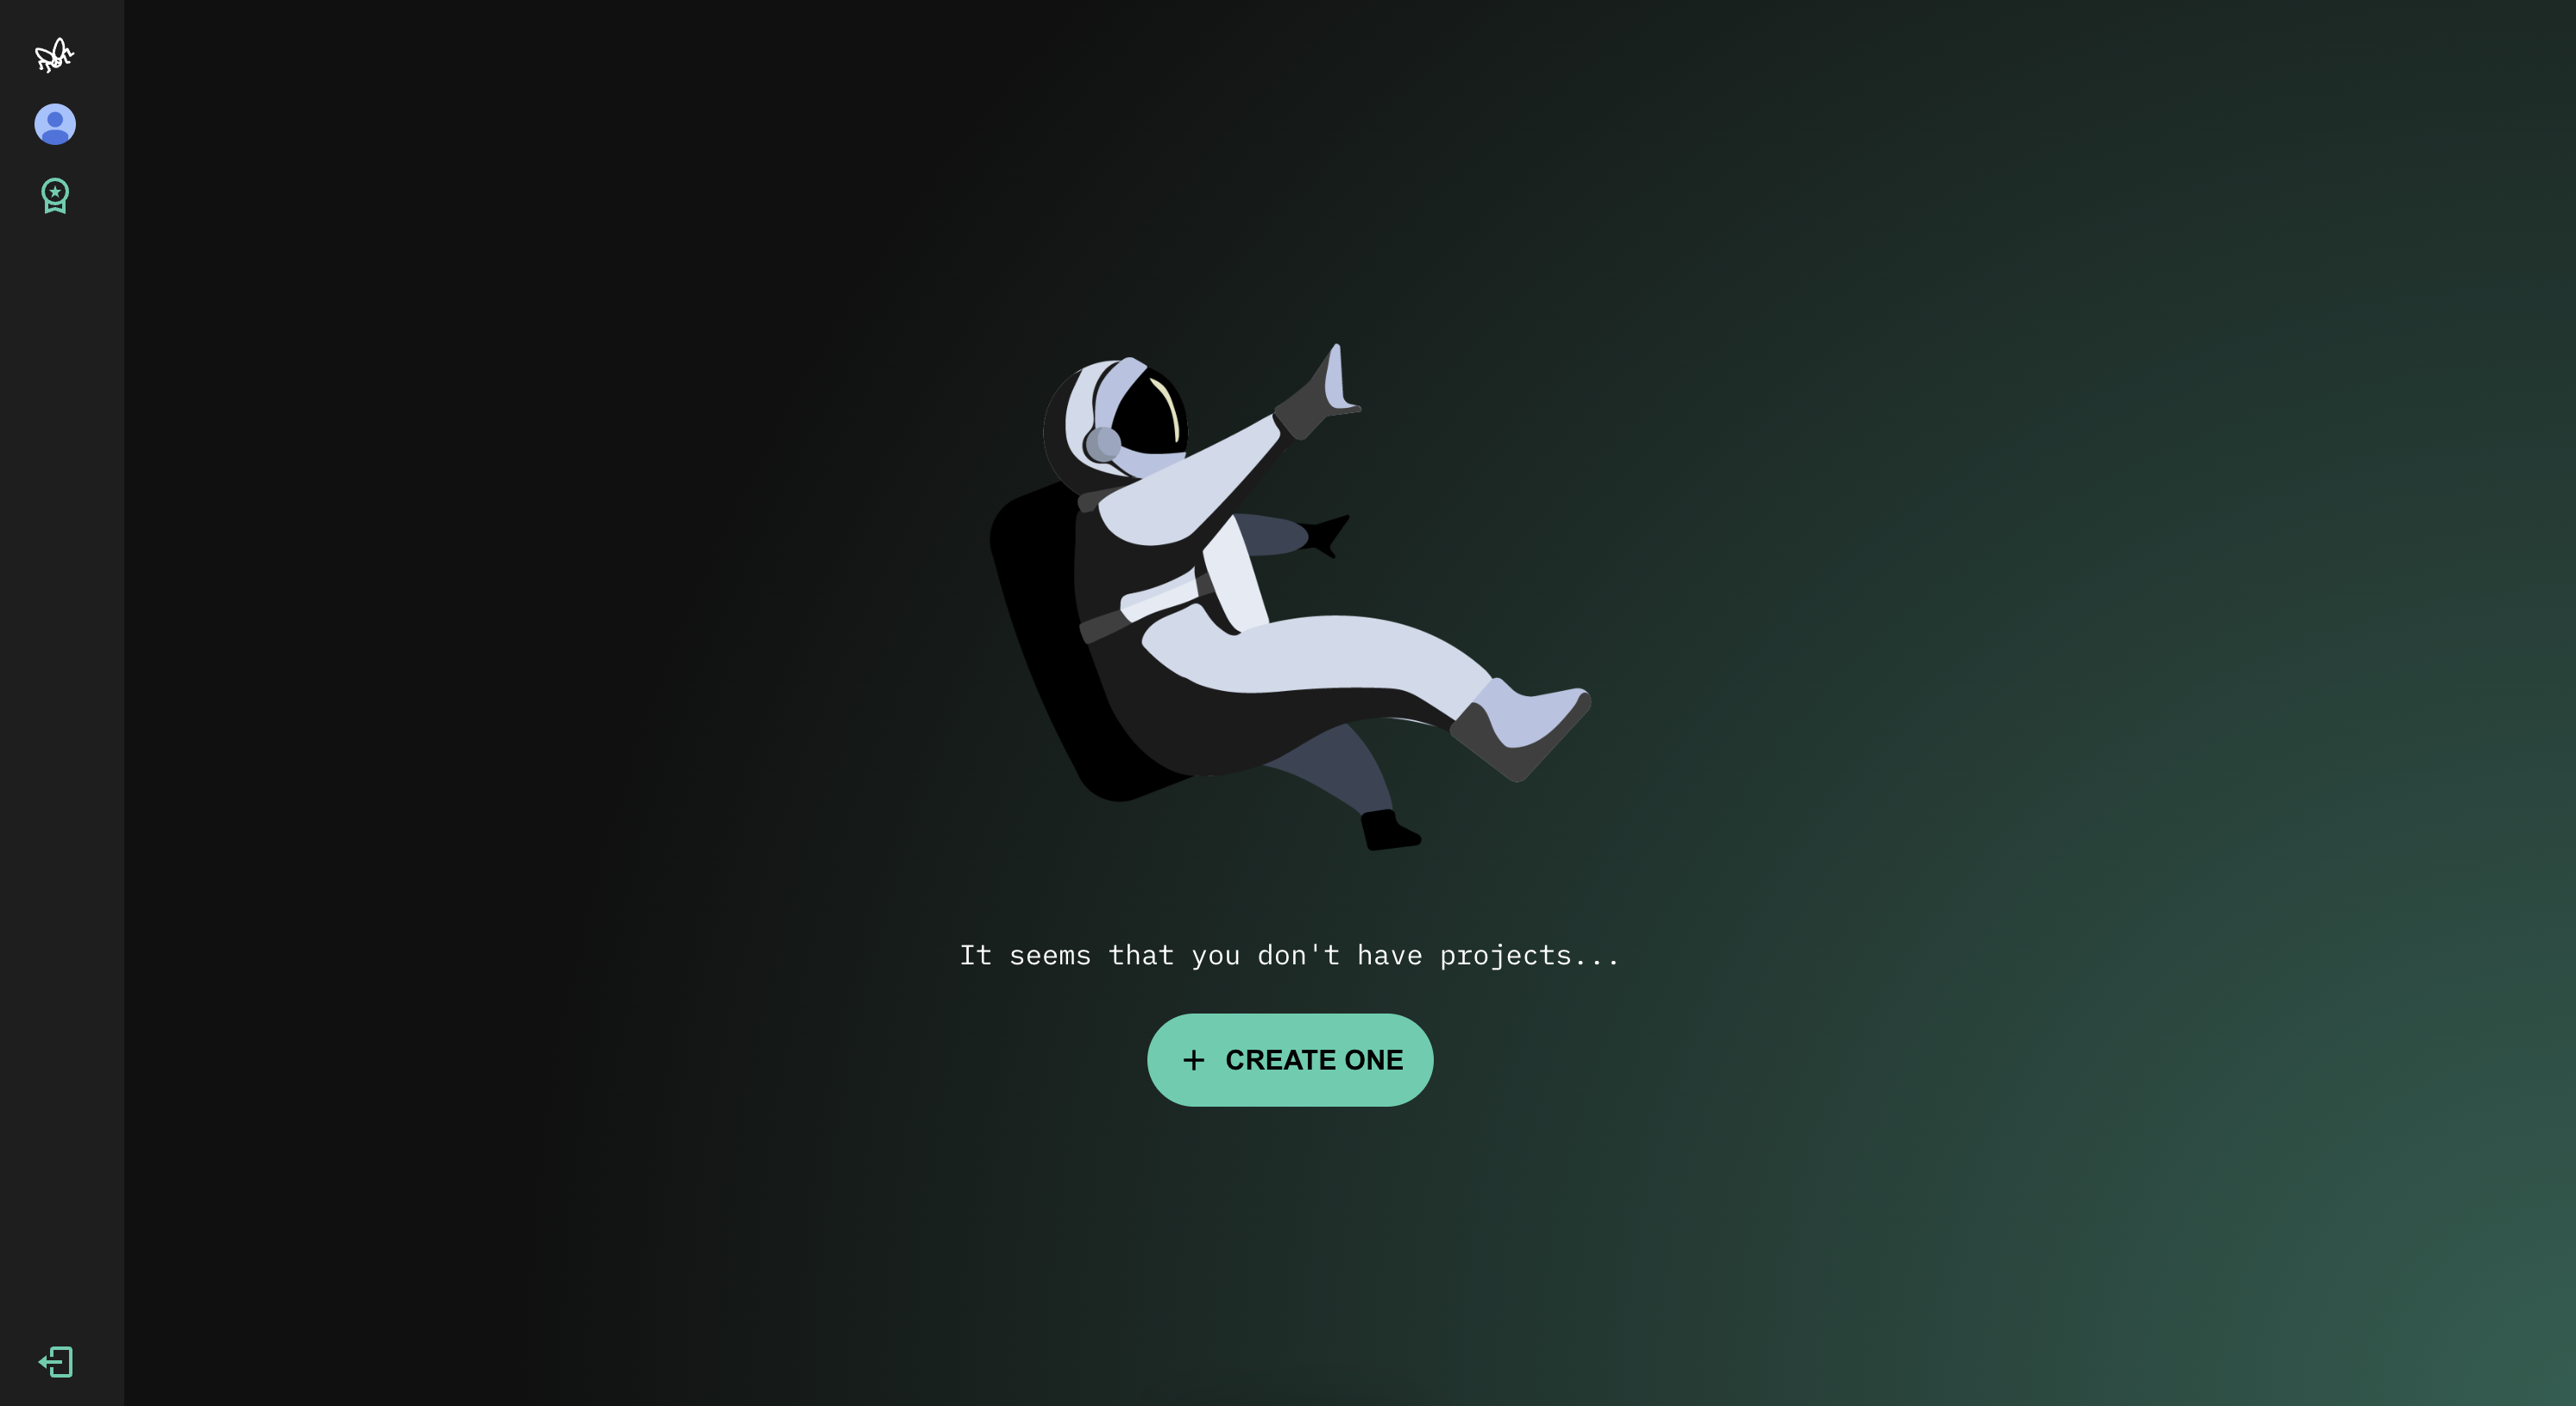
Once you're signed in, you'll be on the main screen. Mockfly operates through projects. You can have as many projects as you want and can invite your colleagues to collaborate with you.
The first thing we need to do is create a project. You will see a screen similar to this:
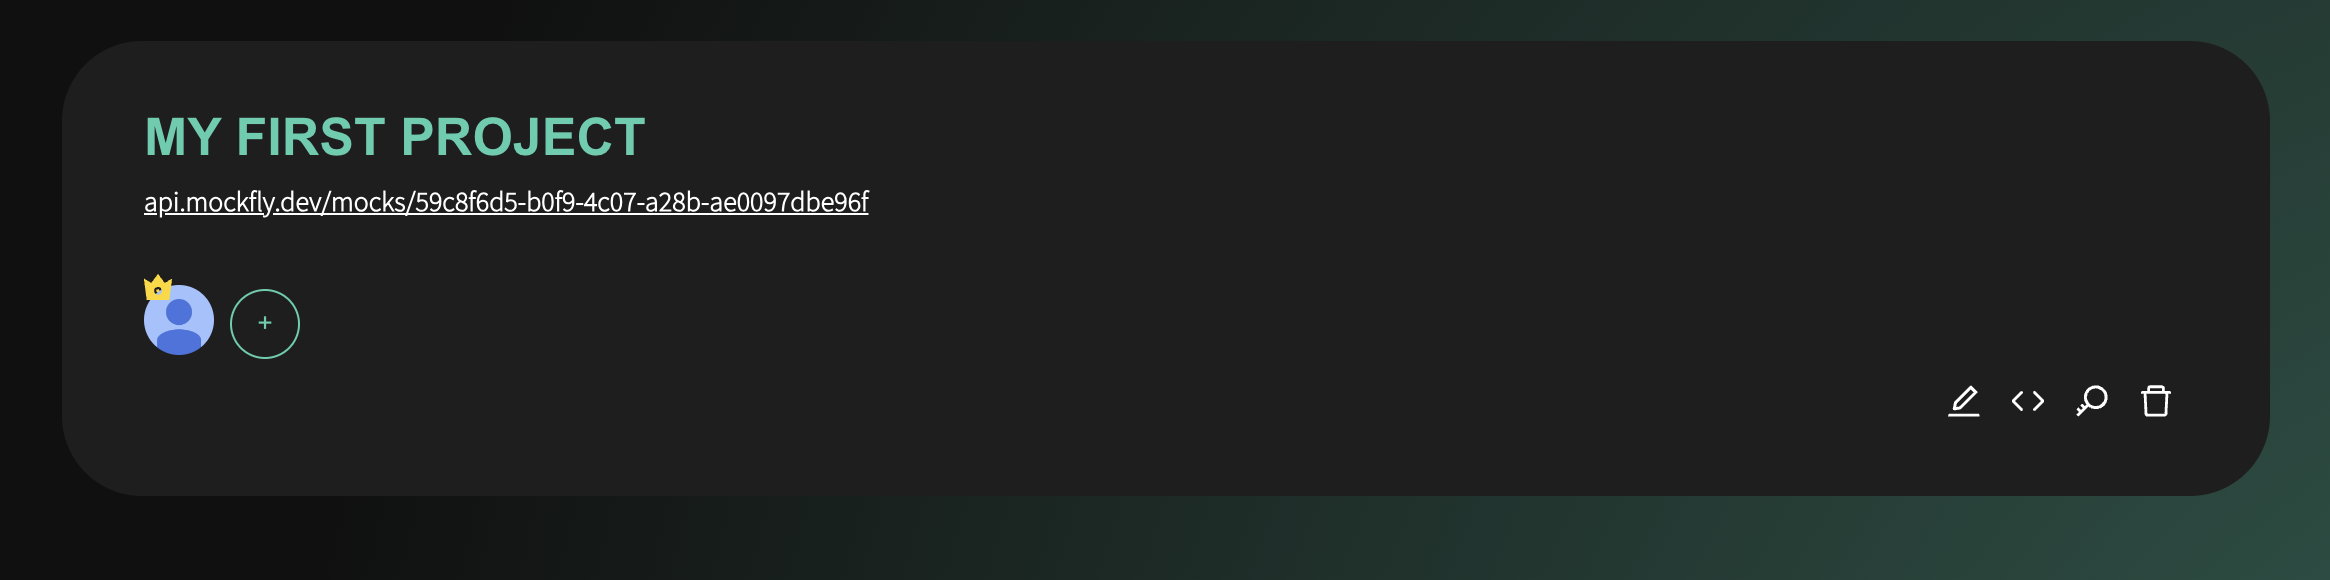
If we click on the "Create one" button, a modal will pop up where we just have to fill in a text field indicating the name for our project. In this example, we've named it "My first project".
Once we hit the "Create" button, the project we just made will appear.
If you want to create more projects, you can click on the button in the top right corner with the "+" symbol. As mentioned, you can have as many projects as you need and invite as many friends as you want.
As you can see, a project has several options and different pieces of information:
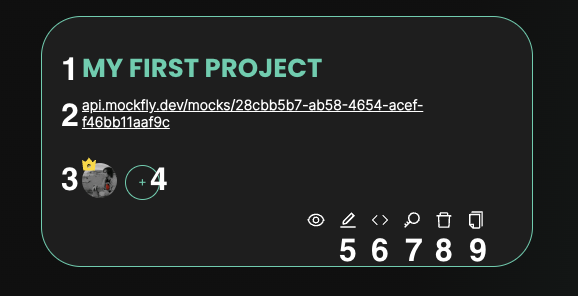
This is the name we've given to the project. If you don't like it, you can change it anytime you want :)
The namespace is your project's "identifier". You'll use it for HTTP requests. Your mock API's HTTP requests should go to https://api.mockfly.dev/mocks/{namespace}. This namespace can be changed, and we'll see how later on.
A list of users in the project will appear. This list shows the users who can add, edit, and delete endpoints. The crown icon by a user indicates that they are the project administrator, who has special privileges such as editing the project name, editing the namespace, and deleting the project.
You can invite your friends to the project so they can collaborate with you in creating a mock API. To invite friends, press the "+" button within the project, and a modal will appear. In this modal, enter your friend's email or Github @handle, e.g., @mockflydev. However, note that your friends must be previously registered on Mockfly to invite them.
In this option, you can edit the project's name. As we mentioned earlier, only the project admin can do this.
You can edit your project's namespace to make it more user-friendly. Instead of a URL like "https://api.mockfly.dev/mocks/e2339048-8e94-4991-b1a1-5c130c548371", you can change it to "https://api.mockfly.dev/mocks/users" for easier recall when pointing your project to consume the mock API.
This option reveals the API key for our project. This API key allows us, for example, to use the chrome extension to add endpoints more quickly.
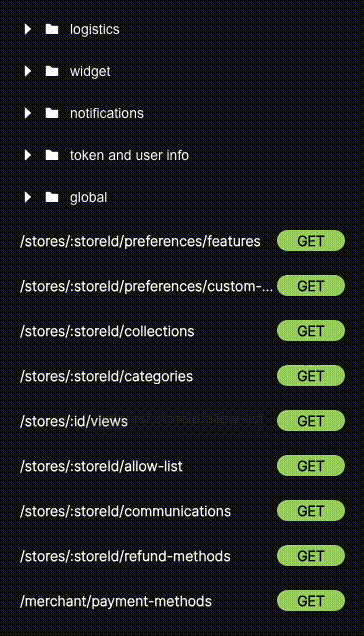
To start creating our first endpoints, click on the project card, and it will take you to a screen where you can select: "Endpoints".
If you have a project that is very similar to another one and you don't want to have to recreate all the endpoints of your mock API server one by one, what you can do is duplicate it. Duplicating it will create a project exactly like the one you have with the same endpoints, rules, etc., and will add a 'duplicated' at the end of the project name which you can then modify.
To create an endpoint, simply click on the button in the bottom left corner:
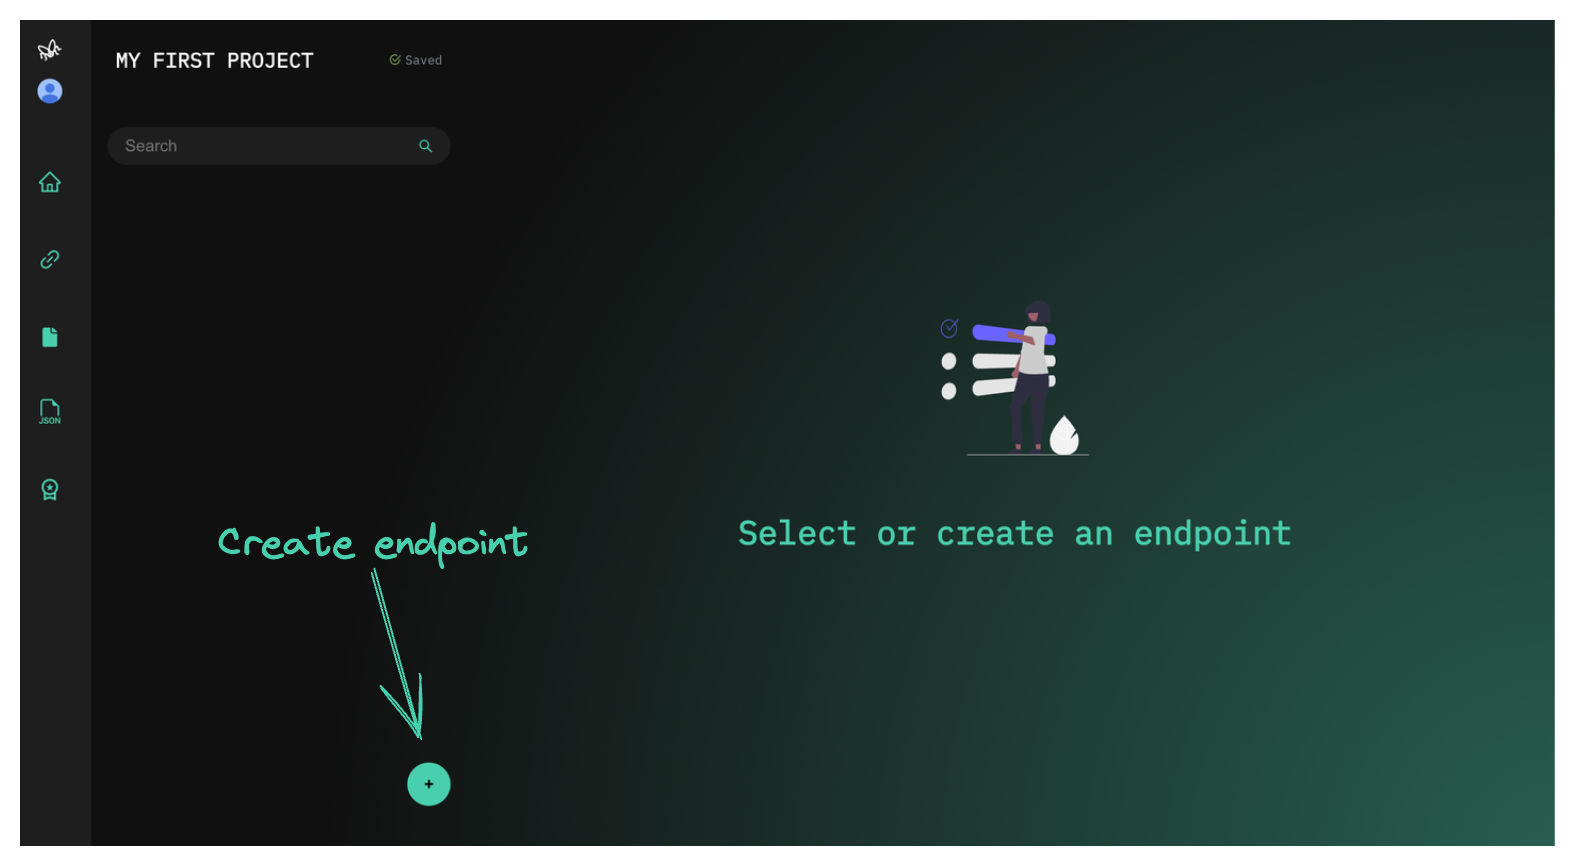
This will open a modal asking for the endpoint path, e.g., /users and the HTTP method. As an example, let's create an endpoint with the path /users and a GET method. Once everything is ready, click the "Create" button to make the endpoint.
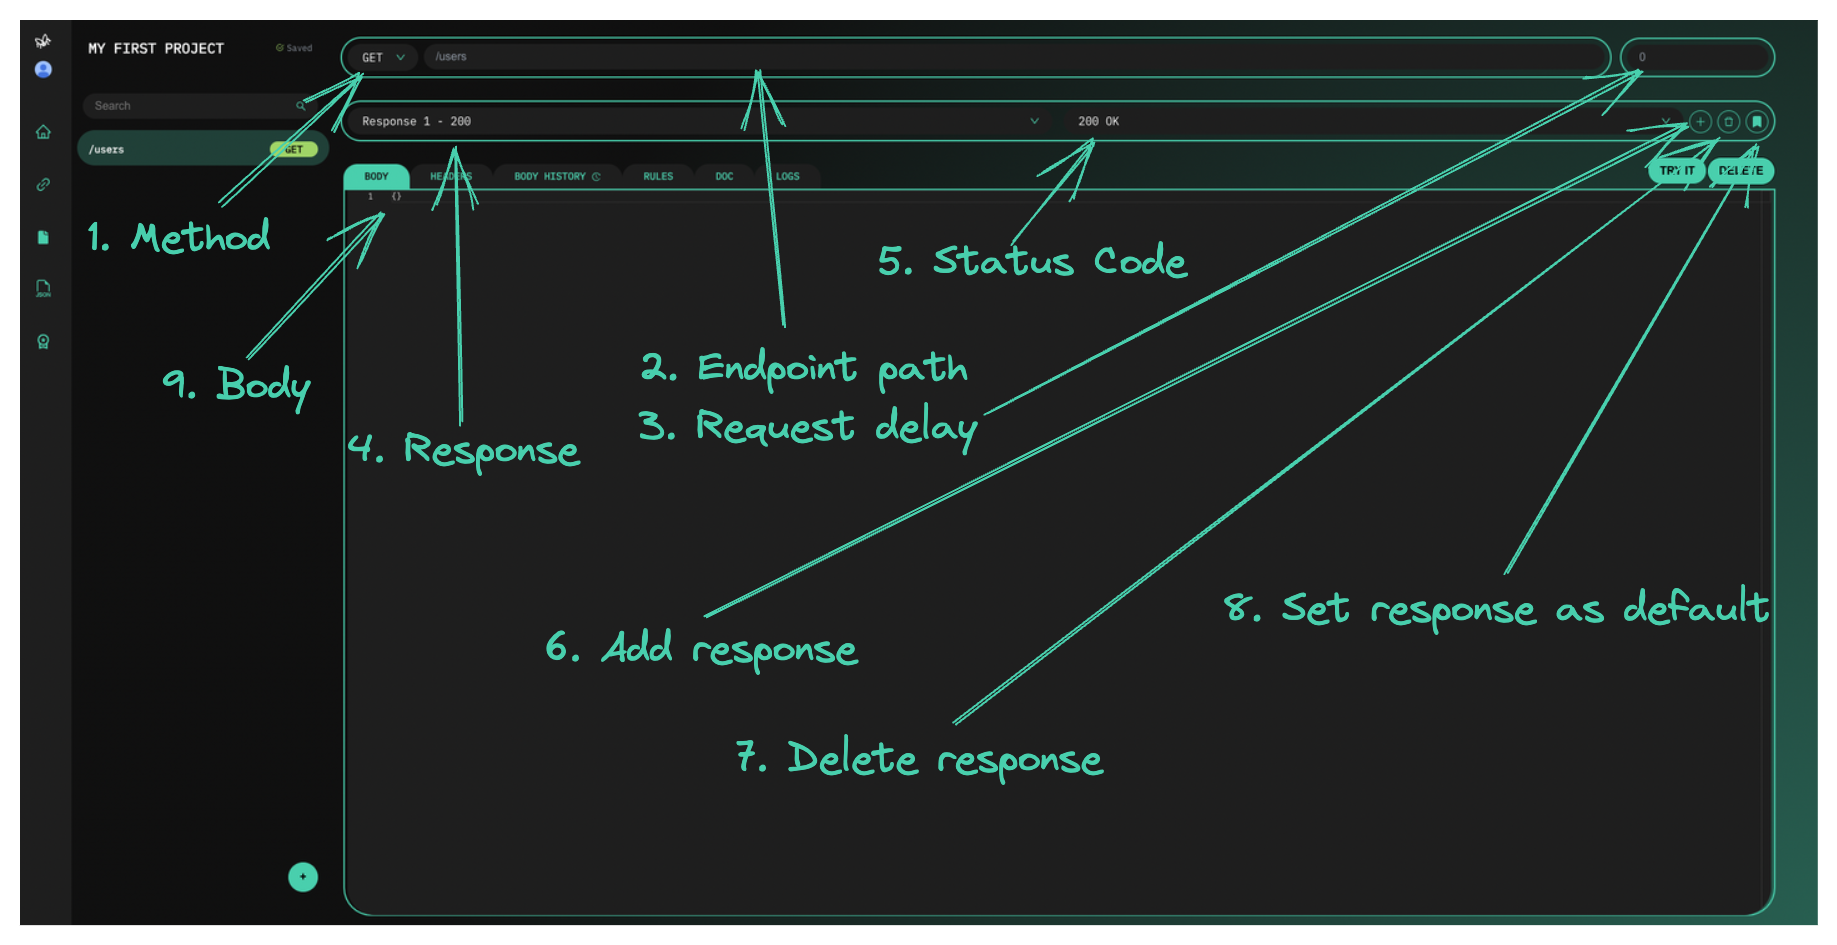
When you want to edit an endpoint, you can adjust various parts of it:
When we have endpoints that are very similar but differ in some data, and we would go much faster if we could duplicate an endpoint and then modify it. This can be done by using the contextual menu of the endpoint. If we right-click, a contextual menu will open where we can duplicate our endpoint or delete it.
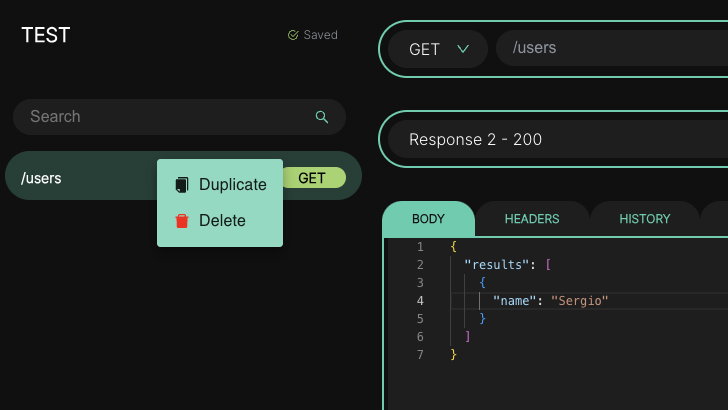
If we select 'Duplicate', an endpoint identical to the one we had selected will be created, maintaining the rules, method, etc., but it will add a suffix 'duplicated' to the end of the path that we should modify.
Now that we have an endpoint named /users, we can edit the body using the integrated code editor. For this test, I'll edit the body with the following JSON:
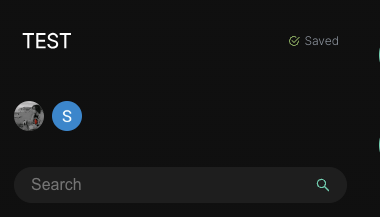
[{"id": 1, "name": "Sergio"}, { "id": 2, "name": "test" }]Look in the top left corner, and you'll see a saving indicator. When it reads "Saved", it means all data has been saved. Typically, it's fast, and you may not even notice you're editing an endpoint. ;)
Once my endpoint is set up with a decent body, I can test it. I have several options. The first, available only for GET requests, is the "Try it" button. This will open a new browser tab and show the response of the created endpoint. Note, this only works if the URL doesn't have dynamic parameters, like /users/:id.
Another option is to click the button on the left with the link icon, which will copy the base URL of your project to the clipboard. Then, add the path of your endpoint to this base. For example: https://api.mockfy.dev/mocks/e2339048-8e94-4991-b1a1-5c130c548371/users.
At times, we make alterations to our mocks only to later wish to revert to the previous version. For this purpose, there's a tab labeled 'History' where you can track the changes made to your endpoint's mock. It operates similar to Git's 'diff' feature. Simply click on the change you wish to review, and it will display what was modified compared to the previous version. This way, you can keep track of the alterations made to your endpoint's response

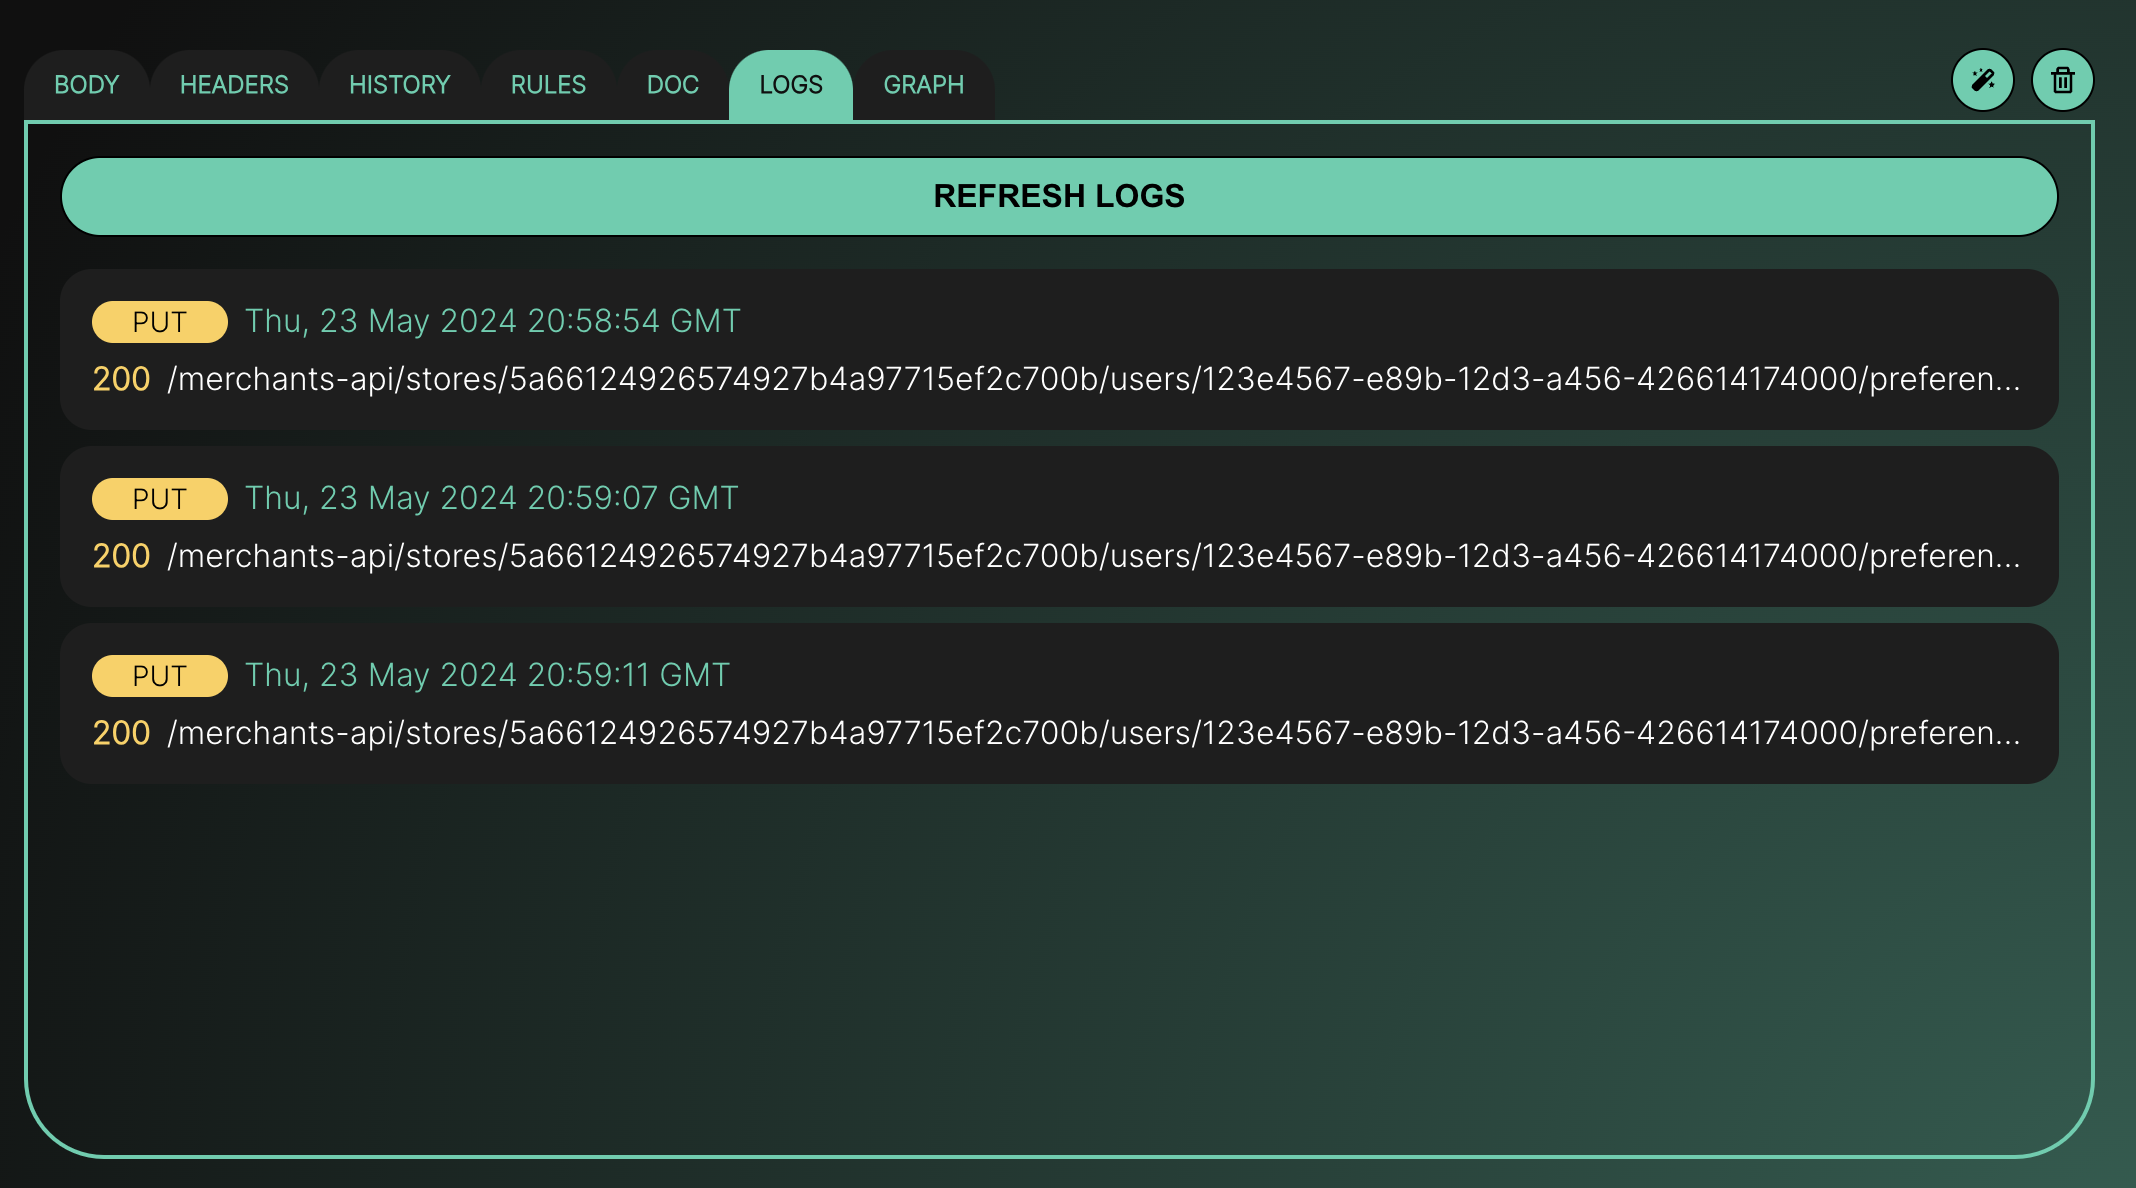
Do you want to know if you're calling the endpoint of your mock API correctly? In the "Logs" tab, you can view the calls made to that specific endpoint. It will display the timestamp, the route, and the status code of the response. This way, you can track the calls made to your endpoint. It's not real-time (yet), but you can refresh the logs by clicking the "Refresh Logs" button.
Can't remember where you returned a specific string? You can easily find it with the advanced text search feature in your mock endpoint responses.
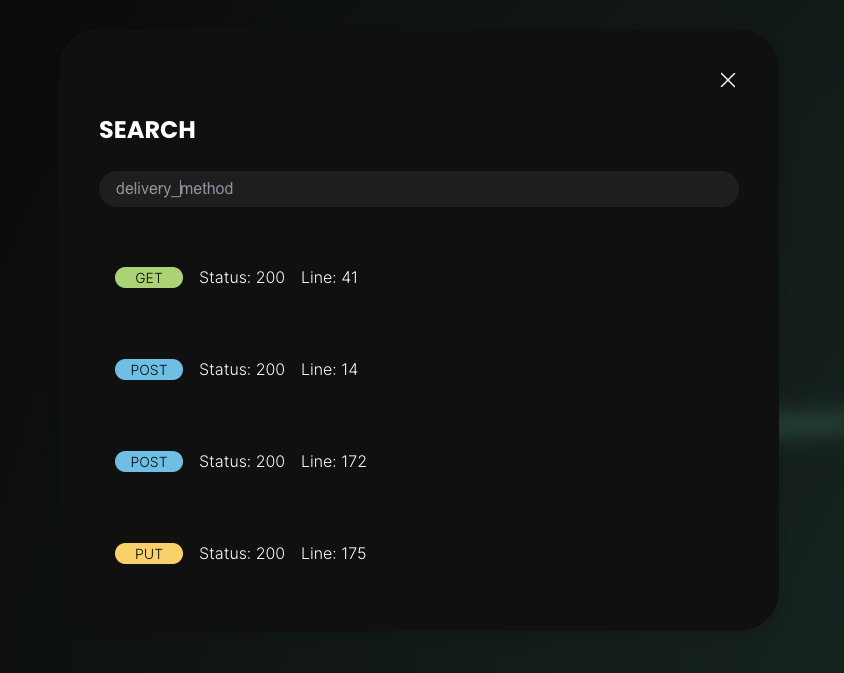
To use the advanced search, simply press "cmd + f" or "ctrl + f" and a search bar will appear where you can type the text you want to find. This will display a list of endpoints along with their responses and the line where a match with the entered text has been found. Keep in mind that it is case sensitive. Once you click on a result, it will take you to that endpoint, select the correct response, and highlight the line in green.
Keep in mind that this feature is only for premium users.
You can see which users are active in a project at the same time as you, as Mockfly displays users who are connected at the same time as you. It's a functionality very similar to the user view in Google Docs, which provides a list of active users in a project. This will allow you to know if there's any user in your project who might be making changes at the same time as you.
By default, the endpoints of your mock API are ordered in descending order as they are created, but you can create your own order by dragging and moving them to any position. Thanks to the drag-and-drop functionality, you can drag an endpoint and place it in the desired position. You just need to hold down the mouse button, and you'll be able to drag the endpoint wherever you want.

As a project grows, it's likely that we will have many endpoints in our mock API, leading to a list of endpoints that becomes difficult to manage. To make it easier to handle, we can create folders to group the endpoints.
We can do this very simply by right-clicking on an endpoint and selecting the "Create folder" option.
This will create a folder named "new folder," and we can rename it by double-clicking on it and entering the name we want. Once the folder is created, we can drag the endpoints from our mock API into the folder, and they will be organized inside it.
If we want to remove an endpoint from a folder, it's as easy as dragging the endpoint out of the folder, and it will be outside the folder again.
We can also create an endpoint inside a folder by right-clicking on the folder and selecting "Create endpoint." This will open the endpoint creation modal and assign the endpoint directly to the folder.